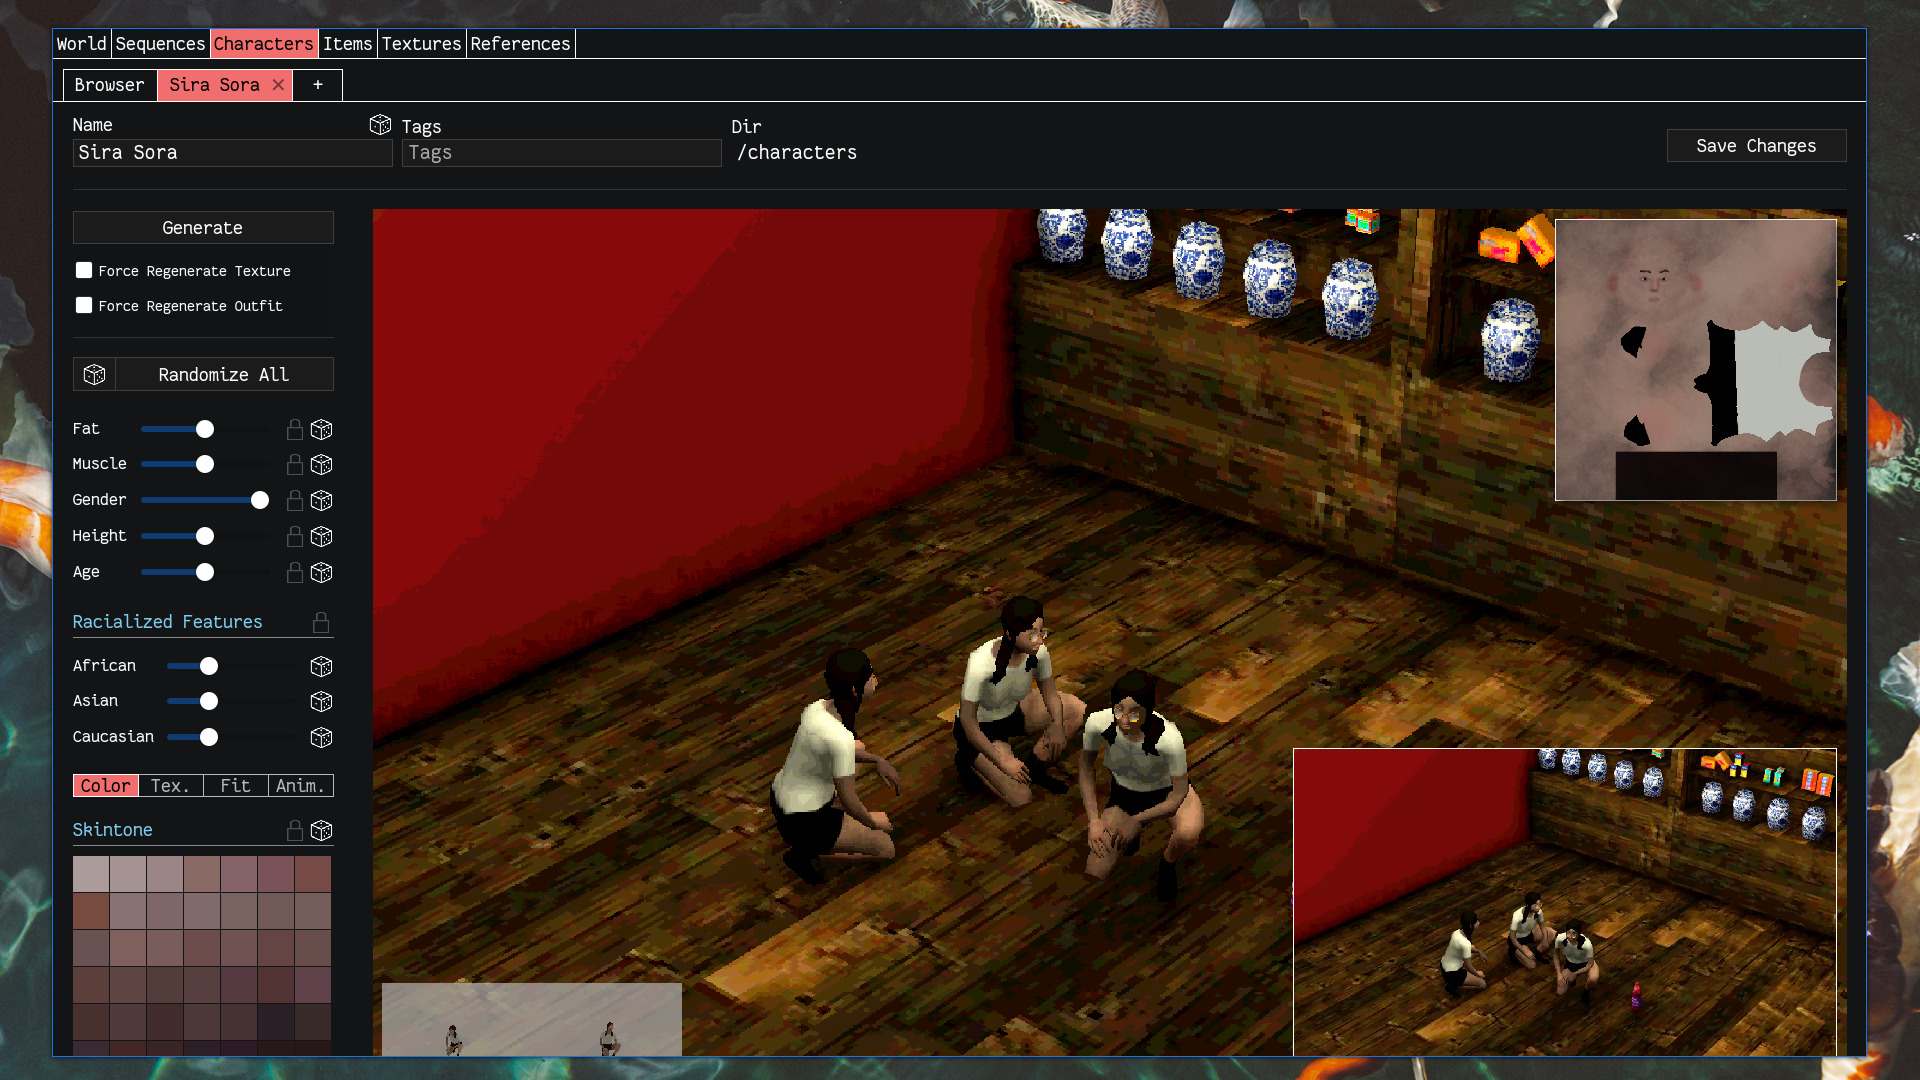
Fugue Devlog 19: Character Generation (Part 2)
After much chipping away the character generation system ("chargen") is mostly complete!
As mentioned in the previous post the character generation system is driven by MakeHuman for the model generation, along with a custom texturing system for generating skin-level details.
This more or less reduces character creation to three distinct production tasks:
- Creating clothes (and hair)
- Creating new texture layers (e.g. tattoos, eyebrows, etc)
- Creating animations
The process works like this:
- Generate the skin-level details as a single texture.
- Generate the model using MakeHuman
- Dress the model using MakeHuman
- Retarget and remap animations to the model
- Export as a GLTF
- Generate preview renders
For documentation purposes I'll go through each part in detail below...but first, some screenshots (see the end for a video demo):

Generating the texture
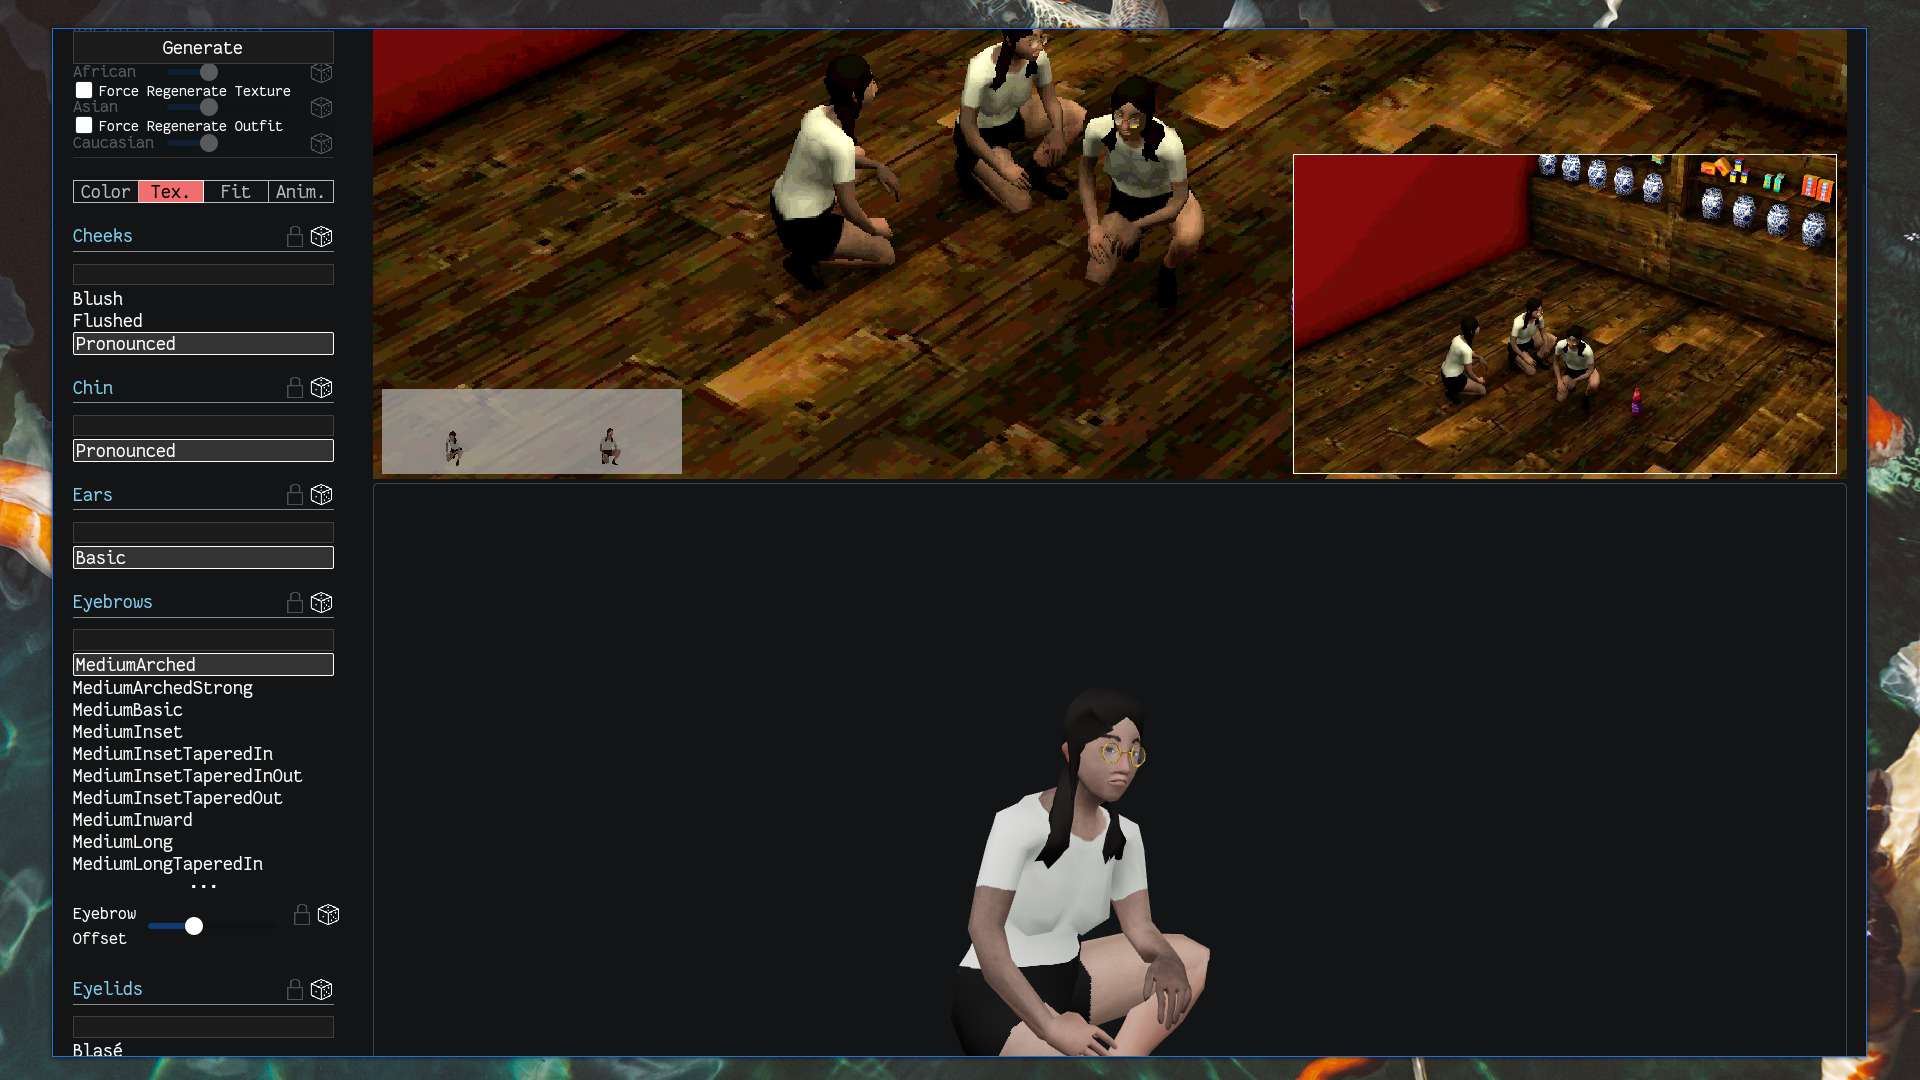
This texture is composed of different layers to represent different features: there's a base skintone layer, then additional layers of shading, e.g. some red in the cheeks and other high blood-flow areas, then other features like eyes, eyebrows, facial hair, close-cut hair, tattoos, and accessories/clothing items that don't need to have separate geometry (e.g. earrings, socks).
These layers are added using different blend modes—e.g. some layers are simply overlaid and others are multiplied—so they mix in better with the base layers.
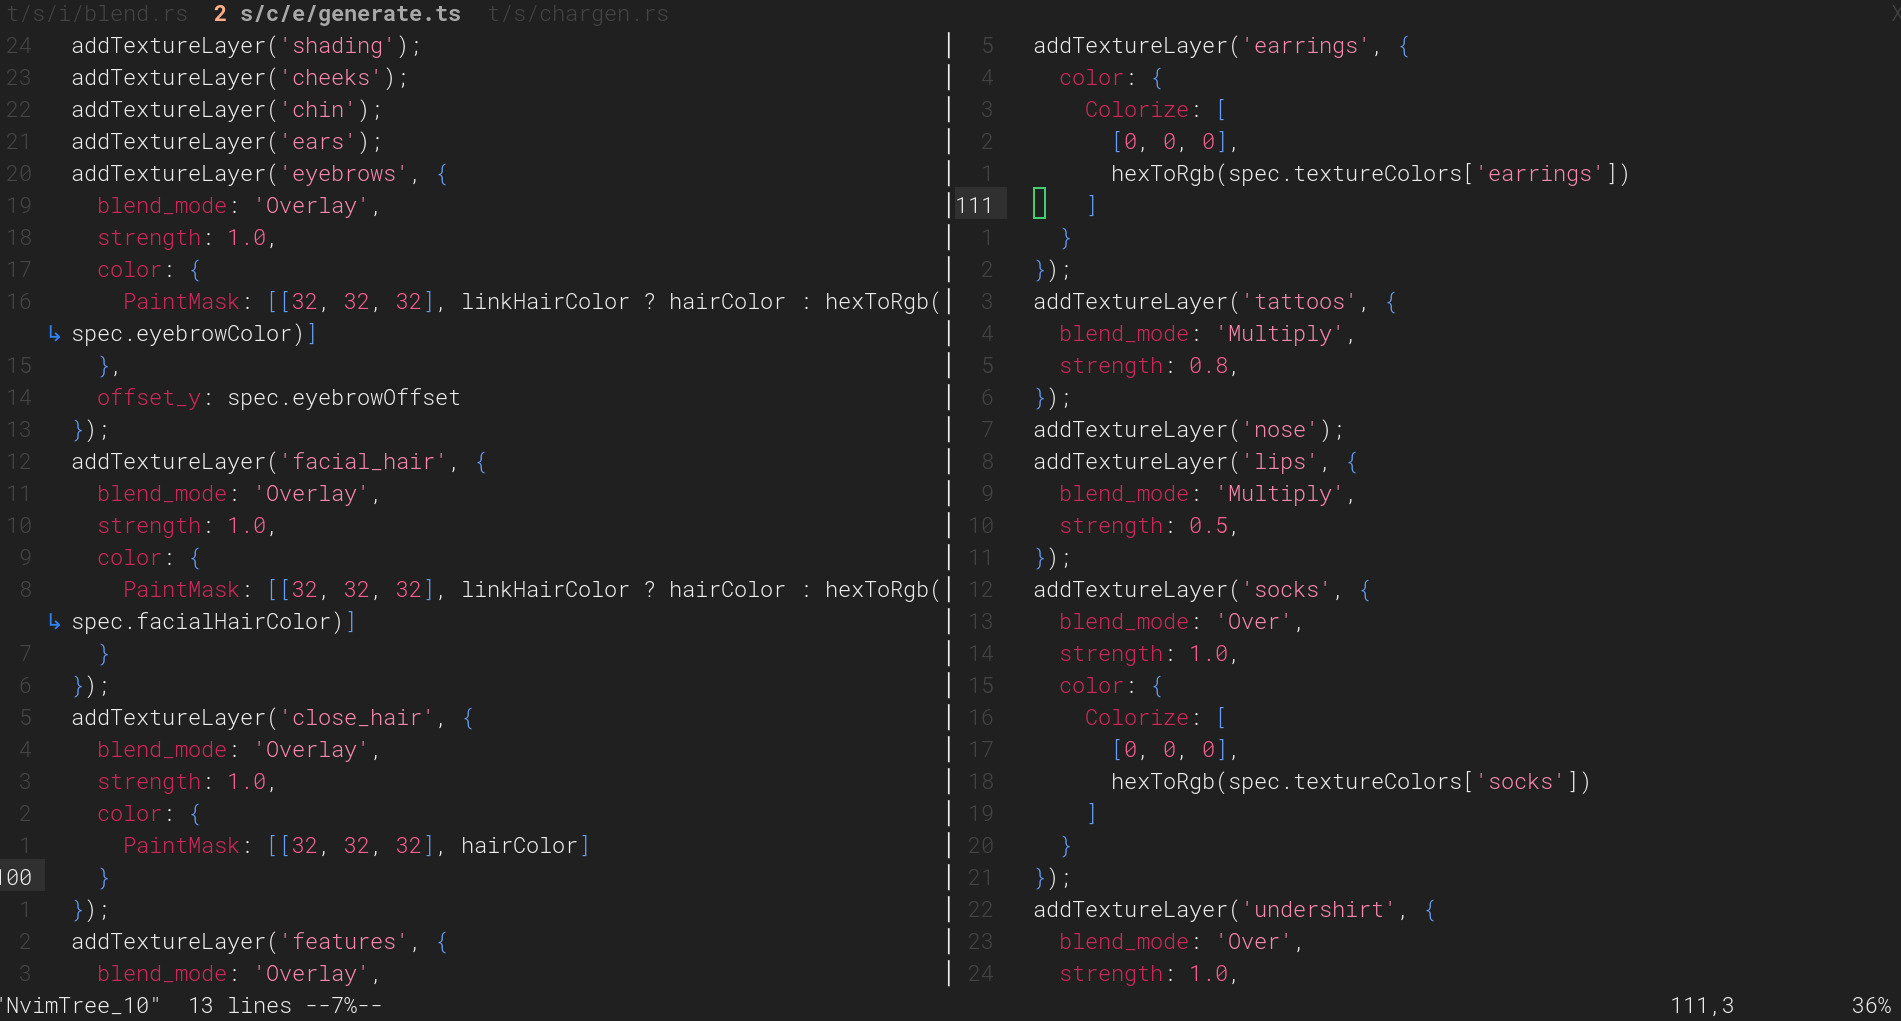
Some layers are used as masks (rather than being used directly) so that they can be filled in with different colors. For example eyes (irises), hair, and socks. In these cases the texture uses a base color (usually something close to black or a very dark grey) that is used as the "anchor" or "reference" color, and then the image is colorized to maintain the relative changes in color throughout. For example, a mask texture might have the base color #181818 but also include blacks and greys that are slightly darker/lighter, and want to change it to a red, say #ff0000. The image will be recolored such that pixels that were #181818 become #ff0000 and other pixels become a shade of red as well, maintaining the same relative lightness/darkness to the base color.
Generating the base skintone texture was tricky at first. Something that is probably obvious to digital/visual artists but that I had to learn is that solid colors don't really look good or interesting (unless you're going all-in on solid colors, like those blocky start-up illustration styles), so the original characters looked kind of bland with their perfectly uniform skintones. Creating a color field with interesting texture and variation is easy enough to do by hand in a digital painting application but took a bit of work to do procedurally. I considered trying to use Perlin noise and its ilk but I don't have any intuition how to control noise well...so it would have taken me forever to get results I'd be happy with.
Instead the algorithm just roughly emulates how a person would produce such a texture...just using a paintbrush texture, painting a base layer of color, and then varying the color a bit and painting low-opacity random strokes on top:

I found that using LAB color space provided the best color variations that "vibrate" or "resonate" with the base color (I love the subtle pinks and greens and blues in the examples above).
This approach not only produces nice textures for the base skintone but also for hair.
Creating the other texture layers is straightforward—just paint onto a transparent image, using this reference image to know where things will show up:

The last bit worth mentioning here is performance/speed. There are a few very slow points in the character generation process and texture generation is one of them...sometimes. The image manipulation is happening in Rust, which is very fast if compiled in release mode. Otherwise it's on the order of 10x slower. Because I'm still developing this content management tool I'm not often building in release mode since you lose access to the browser dev tools when doing so.
Aside on texture sizes: The input texture layers are mostly 2048x2048 (aside from some earlier ones which are 1024x1024). The actual skin texture output is 1024x1024, but I create a downscaled copy at 256x256. This is really small, and pixelation is definitely noticeable in the higher-res viewer but not noticeable in-game, given the size of characters and the downscaling screen shader effect (n.b. the screenshots here are using the 1024x1024 textures, not the 256x256 ones). Again, not really sure that texture size/memory use will be an issue, but I don't need them to be bigger than this so might as well keep them small.
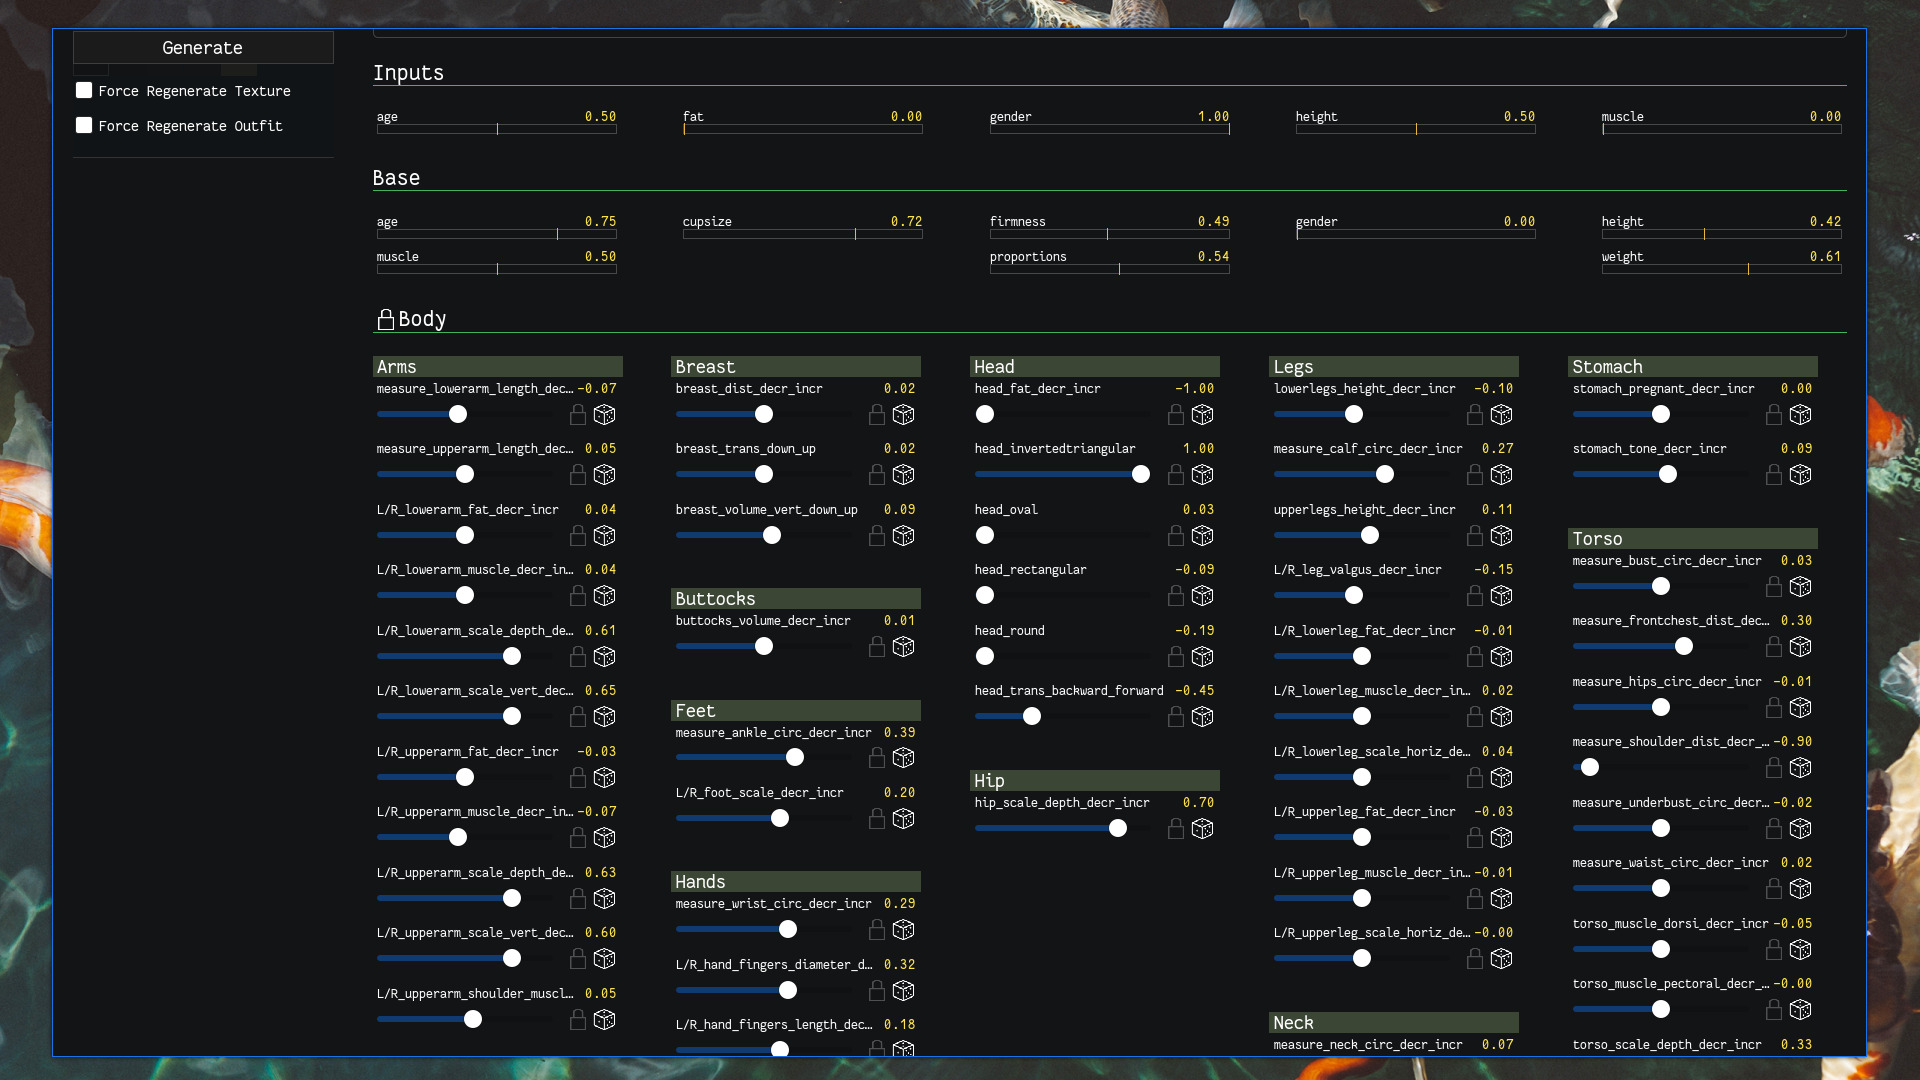
Generating the model
This step is the most straightforward since the bulk of the work is handled by MakeHuman. MakeHuman provides a number of parameters to control the body model, e.g. how much muscle there is in the upper arms, the shape of the face, etc. What I do is take a few higher-level parameters—gender, fat, muscle, height, age, and a few parameters that MakeHuman uses for more racialized features—and translate them into the more fine-grained parameters. These finer parameters are all random but parameterized by the higher-level ones, with the exception of some parameters such as facial parameters, which are totally random.
For example there's a parameter called arms_{L,R}_lowerarm_muscle_decr_incr. The sampling distribution for this might find most of its density in (-1, 0) if the muscle slider is turned all the way down, and would be in (0, 1) if turned all the way up.
This step also applies the MakeHuman "game engine" rig to the model.
Dressing the model
The dressing of the model (applying clothes and hair) is also very straightforward since it's again handled by MakeHuman. The part that's more complicated is the production of the actual clothes and hair assets to be used.
This process is tricky in part because I'm just not a very experienced modeler, but the lowish-resolution look is more forgiving of that. The main reason it's difficult is that MakeHuman/MakeClothes has a couple requirements that can be very hard to satisfy. The mesh must consist either entirely of quads or triangles—no mix allowed. In practice this would not be too bad—you can always convert a mesh entirely to triangles (using Blender's Triangulate Faces), which as far as I know is what a game engine typically does anyways—were it not for a second MakeHuman/MakeClothes requirement that limits the maximum edges allowed for each vertex. It's something like 8 edges max for any vertex (called "poles"). Going through and figuring out how to reconstruct your geometry to get rid of these poles is hard...some are easy, but others become weird geometry puzzles.
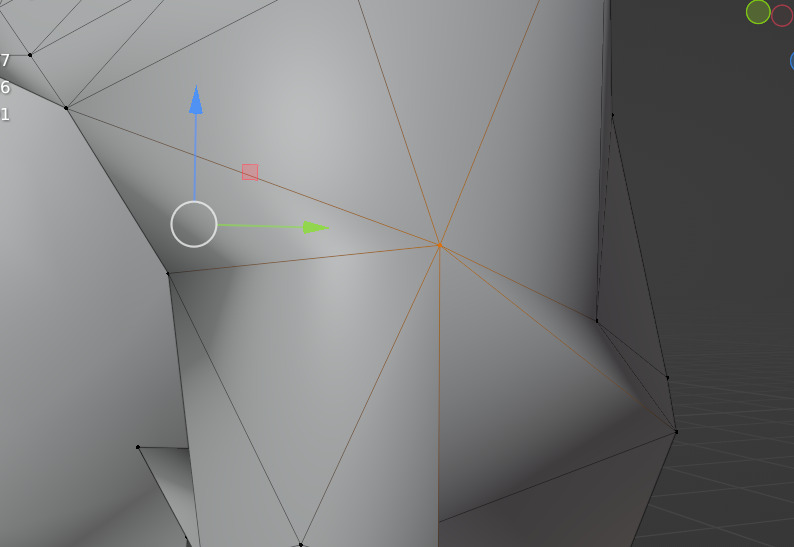
I haven't been able to come up with a good foolproof method to avoid this problem. I try to stick to quads when modeling clothes/hair but sometimes you just forget and end up introducing a triangle or n-gon somewhere. Or I want to reduce the poly count so I use Blender's Decimate modifier, which works amazing for reducing polys while preserving the general shape, but then introduces triangles and poles.
I did come up with one procedure for removing poles that has so far worked maybe 2/3 of the time, and is fortunately easy to script:
import bpy

bpy.ops.mesh.select_more()
bpy.ops.mesh.hide(unselected=True)
bpy.ops.mesh.select_less()
bpy.ops.mesh.delete(type='VERT')
bpy.ops.mesh.select_all(action='SELECT')
bpy.ops.mesh.edge_face_add()
bpy.ops.mesh.quads_convert_to_tris(quad_method='BEAUTY', ngon_method='BEAUTY')
bpy.ops.mesh.reveal()
What this does is it deletes the problematic vertex/pole, builds an n-gon face out of its surrounding vertices, and then converts that into triangles. Usually this creates edges that get rid of the pole completely, but it can also just move the problem to a different vertex.
I anticipate spending a lot of time making clothes/hair because that's probably where the bulk of character variation will come from, so I hope I can figure out a more reliable solution soon.
The last thing to note here is that the grammar system I mentioned in the previous post is also implemented into the tool. Almost all the parameters depicted above can be randomized, including the character's outfit, which can be randomized using an outfit grammar.
One funny thing is that I spent a bunch of time modeling hair and it's given me a greater appreciation of the variety of hair styles and how much they change someone's look. I'm sure it's obvious to many people but not something I spent much time thinking about. Now I catch myself really studying the silhouettes of people's hair lol.
Mapping animations onto the model
There isn't a whole lot to say here since I haven't figured out a animation/mocap process, so I'm just relying on Mixamo for now. The process of retargeting/remapping these animations to the character model is fortunately very easy thanks to a Blender addon called "Auto-Rig Pro". I did have to create a custom remap config to go from Mixamo to MakeHuman's game engine rig though, and it was a bit tricky to make sure that all animations were correctly exported (due to me not understanding how Blender's actions and NLA editor work).
This step is also a hit for performance. The retargeting/remapping process just takes a lot of time: a few minutes for 3 animations, but this will vary on the keyframe length of each animation. Not sure that I can really do anything about that though.
Exporting the model to GLTF
This step is also pretty simple, just exporting the GLTF from Blender. The GLTF format is what Godot uses for importing the model.
The only thing I need to look into here is performance. It takes a ridiculous amount of time to export and absolutely shreds my CPU. I can barely do anything else while it's exporting. I'm not sure what's going on as it's just a fairly low poly model that's being exported.
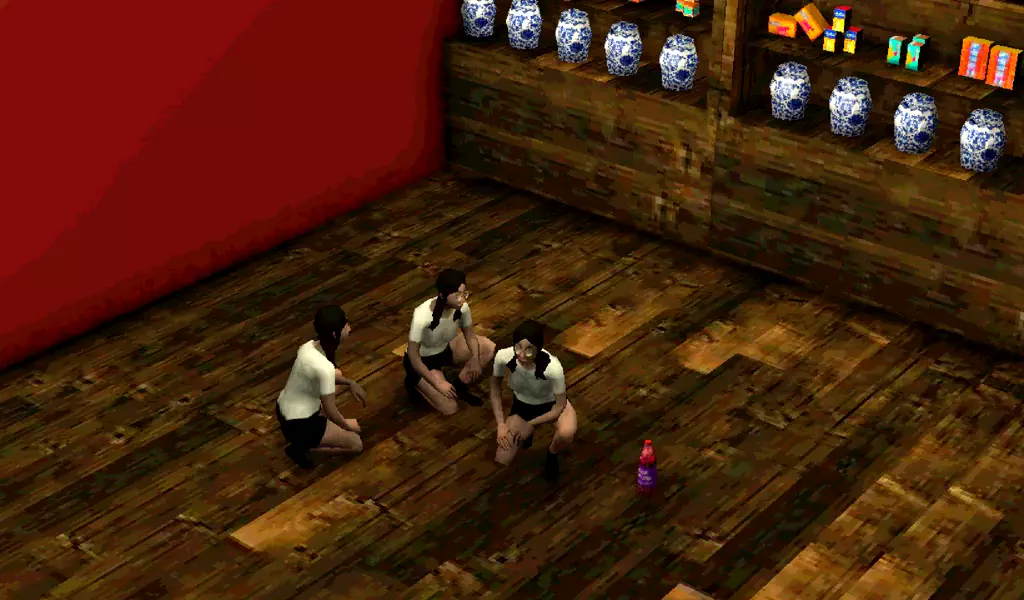
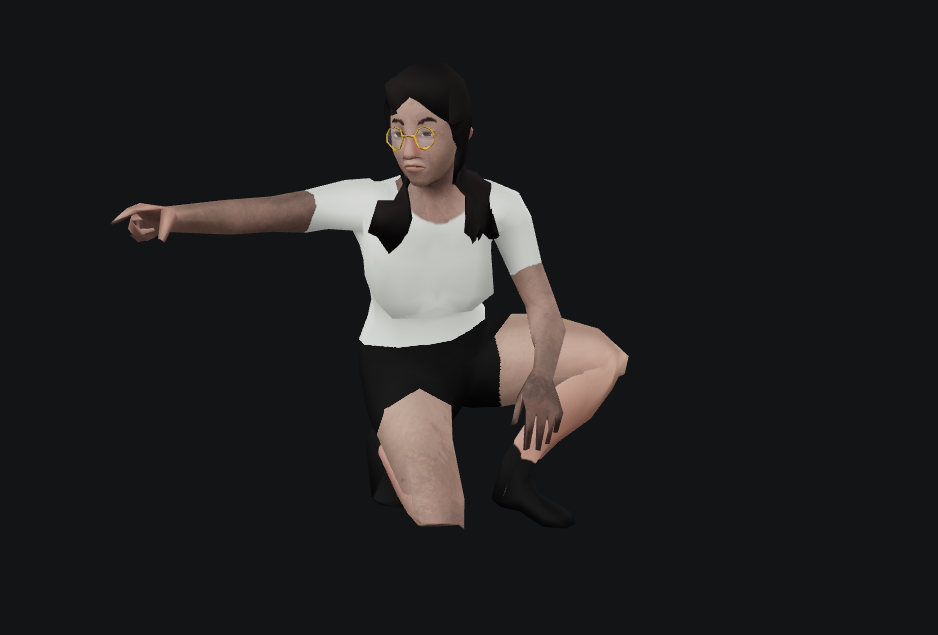
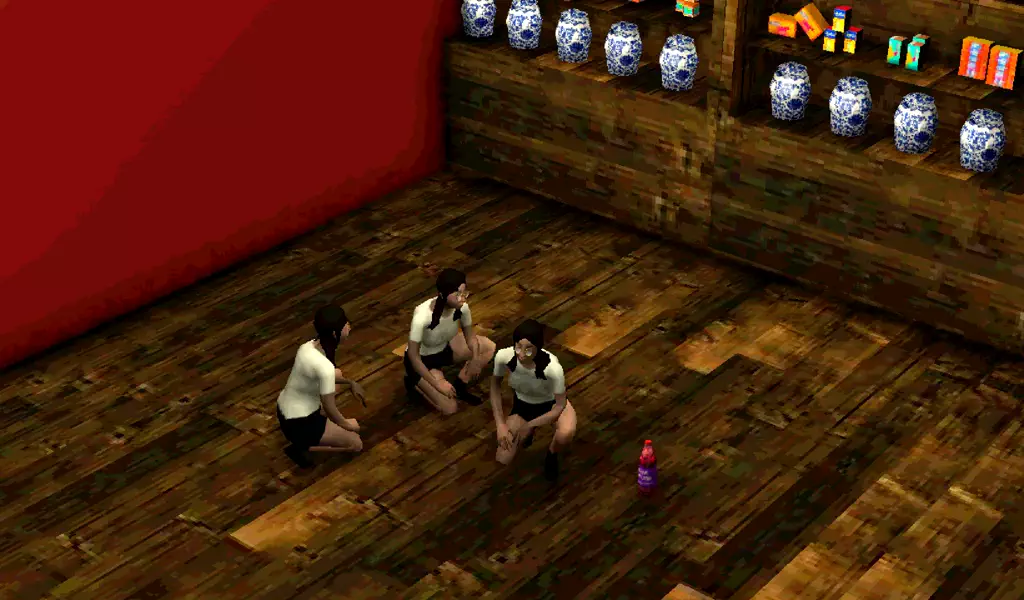
Generating preview renders
The final step is generating preview renders to see what the model will actually look like. A couple of these renders are done in Blender but they aren't as useful as the in-game renders, which let me see how the character looks with the game's lighting conditions and screen shaders. This was also surprisingly easy to setup as Godot provides a convenient way to run the engine headlessly and take screenshots.
I was also able to use the same approach for previewing things in-game directly from Blender:
Fears and Steps for the Future
There's still more work to be done. I haven't fully finished integrating characters into Godot, so there may be other things that need to be fixed there. And I don't have a great intuition about what poly counts I should be going for, so a great anxiety is that my poly counts will be too high and I'll have to go back and redo the base character mesh and all the clothes/hair meshes. I don't really anticipate this being a problem because poly count is (what I think is) low across the board and from what I've read poly counts are less likely to be bottlenecks nowadays. But you never know with these things...and I could probably safely lower the poly count of the base mesh, so I should probably do that earlier rather than later...
Update: Lowering the mesh poly count
After writing this I investigated lowering the poly count for the mesh. The original human mesh is around 3k tris—for reference, the Final Fantasy VIII Kiros model I was using for testing is around 750 tris, which was for the original PlayStation. Individual items of clothing so far ranging from 250-800 tris, though I could probably reduce those a fair amount more. Some of these clothing items delete the parts of the human mesh they cover, so they add less to the overall poly count.
Lowering the poly count was a difficult process: after applying Blender's Decimate modifier there were several poles (the same issue mentioned above) that took a very, very long time to eliminate, but also because the poly reduction process and subsequent pole-editing messed up parts of the UV map which took awhile to fix (UV map editing in Blender is awful). I had to try and match the original UV map as much as possible or I'd need to re-create all the texture system layers, which I really did not want to do.
But I managed to produce a few lower-poly human meshes. The biggest reduction was down to about 750 tris. This lost too much detail, especially around the face. I tried a less extreme version that was about 1300-1400 tris, which was better, but having fewer vertices reduces the effectiveness of MakeHuman's parameters though and made some parts too angular. Then I tried another version targeting the Decimate to the hands (which is the most detailed region after the face) and feet (which usually aren't going to be visible and don't need much detail), getting things down to about 2k tris while entirely preserving the face and preserving the original UV map as much as possible. A 33% reduction in polys isn't bad!
In the higher resolution previews the hands are noticeably blockier:
But this is less apparent in-game:
For all I know this is a premature optimization and ~3k poly character models are fine. In theory if I ever need to switch the base human model I can just do so by batch re-generating all of the characters, but as the game develops it may become more complicated to do that. Hopefully I'll have a better sense of what poly count works before that.
Small update: So something about the reduced poly mesh messes up the vertex mapping to the base MakeHuman mesh, I think. Basically vertices on the face/head are being deleted when vertices in the torso should be deleted. I may need to try a cleaner approach to reducing the poly count, that won't mess up the underlying geometry as much...e.g. doing it by hand.
Update: Improving GLTF export times
The GLTF export times were around 10 minutes with 3 animations, which was way too slow. I was not exporting much—only the renderable/visible objects, which was just the lowish-poly human mesh and clothes. Everything else was hidden. But for some reason (which may be related to this issue) the GLTF exporter still processes hidden meshes, even if they aren't to be included in the final GLTF. So the base MakeHuman mesh, which is pretty detailed, was taking up the bulk of the processing time. After deleting that mesh and some other objects (rather than just hiding them) the export time went down to about a minute. The character generation system does this exporting through a headless Blender script, but when exporting from the Blender UI it takes only ~15-16 seconds. No idea what could be the cause of that discrepancy.
Now the main bottleneck is the retargeting/remapping of animations, but again, I don't think I can do much to speed that up.