Fugue Devlog 26: More tool building and 3d nightmares.

01.20.2024

It's been a while since the last update; I was away at a language immersion program and then very busy with our move to Paris but managed to find some time here and there to continue work on the Fugue. Though it's probably more accurate to say the "pre-work" on the game, as I'm still deep in setting up all the tooling and infrastructure that will hopefully make the actual game development feel more like building with Legos.

The biggest development is that I re-wrote the GUI tools from tauri/typescript to egui/rust. Having a web-based UI is just too heavy and if I'm going to be using something frequently I'd want it to be quick and snappy. That in itself was challenging because the UI tooling is so much better for the web (makes sense, given that it's the dominant type of UI these days) and the Rust ecosystem in general is still in its infancy. But ultimately it was worth it.

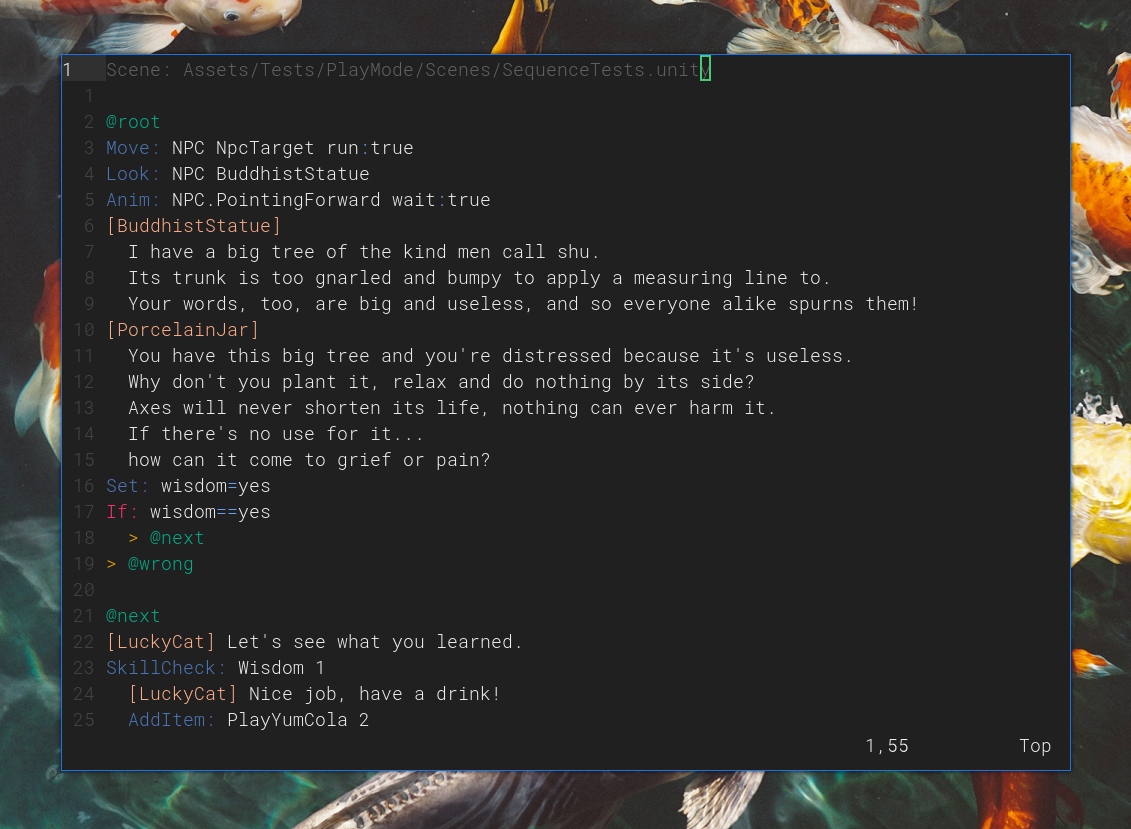
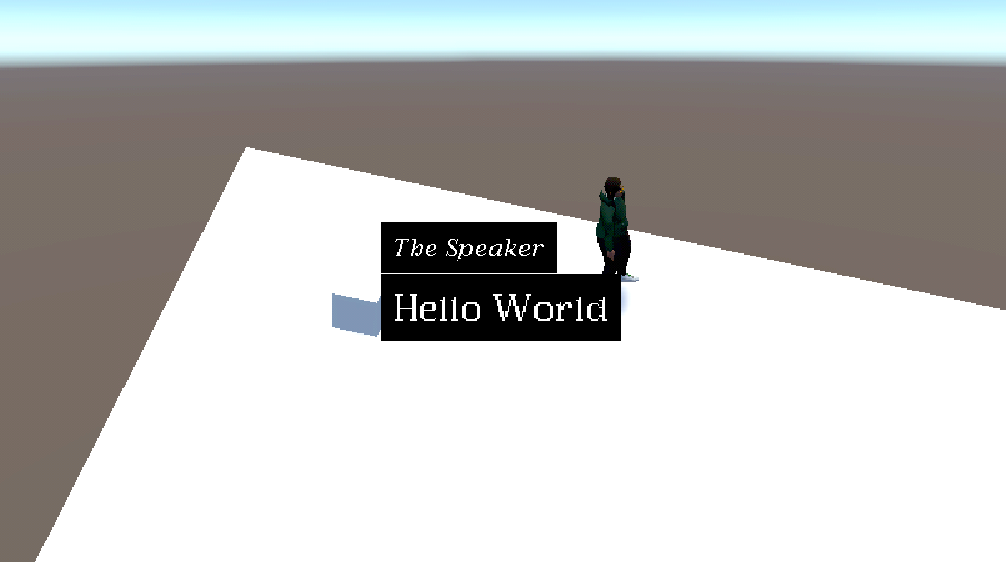
Two completely new tools are crane and depot. On the point of wanting to avoid clunky UIs, Unity is so sluggish on Linux (not sure if the same is true for Windows) and just adds so much mental overhead to assembling scenes within it. crane is instead a very simple scene editor with modal controls (à la vi/vim; I'm a zealot) which is capable of parsing and exporting Unity scenes. So the bulk of scene editing/creation can happen in there, with some parts (MonoBehaviour scripts, etc) that might still need to be done from within Unity, but are far less common tasks.

Depot & 3d overload

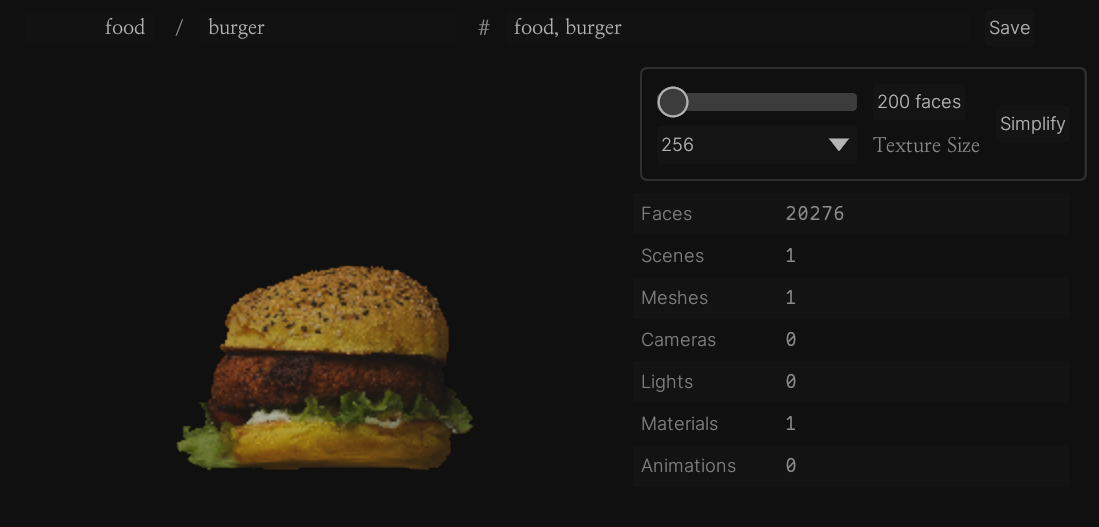
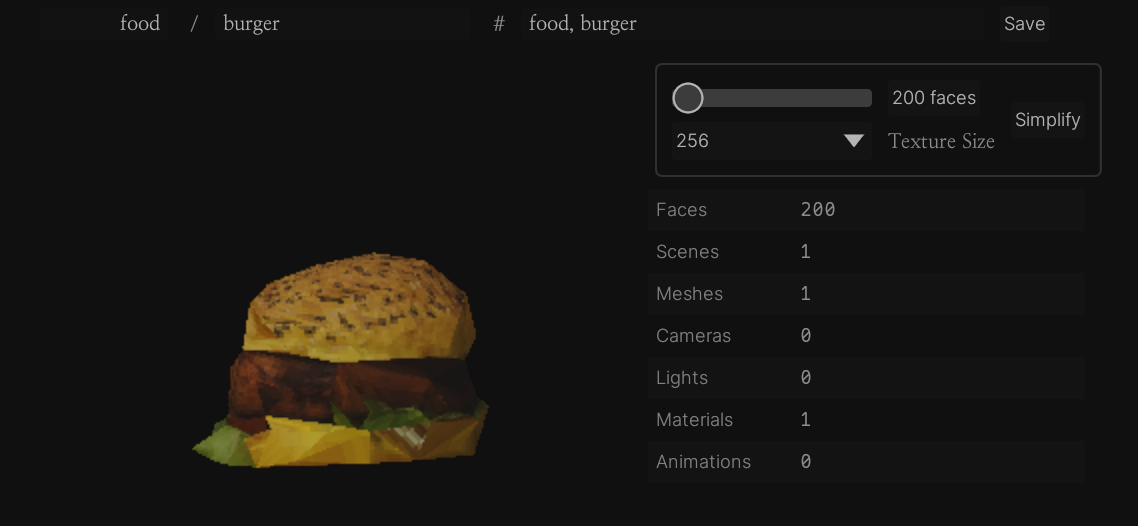
depot manages all the non-character 3d assets, tracking licensing and attribution where needed (e.g. CC-BY licensed assets), and common 3d processing tasks built-in. Primarily this is generating model variations with different textures and mesh simplification (way more on this below). It'll eventually integrated with crane so crane can directly pull models from depot to add to a scene.

As I alluded to a long time ago, the 3d model aspect is probably the most difficult part of the technical aspect of the game's development (writing, character development, etc are harder—and more fun—but leaving those aside for now) and I've decided the best approach is to set aside some budget to purchase pre-existing assets and hand-create only the simplest things. The amount of time saved will be well worth the cost.

The downside of using pre-made assets, however, is a lot of variability. Meshes can vary tremendously in poly counts, textures, etc; not to mention model formats (obj, fbx, gltf/glb, etc) which is a massive challenge itself. So I basically need a processing pipeline that can take a pre-made asset in any format (or at least the major ones) and turn it into something optimized and visually consistent with everything else with as little input from me as possible. Buying pre-made assets is moot if I have to spend just as much time adjusting the model to fit my particular needs.

This led me down a dizzying rabbit hole to the world of 3d software-stuff (? not sure what to call it) and so far I've come away with the following learnings:

  • There are too many 3d formats! And no reliable means of converting between all of them, or even just the major formats. There's assimp which seems ill-maintained, and you can use Blender too but it's frankly heavy for the job. The best tool I've found so far is trimesh but afaik they don't provide a command line tool or anything, so you need to have Python setup to use it. It'd be so nice to have something like ffmpeg but for 3d models. Instead I've found that specific conversion software, like obj2gltf or fbx2gltf are the most reliable.
  • Formats aside, there's so much variability already in meshes (welded vs unwelded, tris vs quads, messed up normals, bad UV mappings, water-tightness, etc) and thus so many opportunities for malformed meshes that will just gunk up any automated processing you have set up. Again, trimesh has so far seemed good at standardizing models to some degree such that they'll then work for other mesh simplification programs.
  • In terms of pre-made programs and libraries you often see just two extremes: extraordinarily expensive but good & robust (I'm guessing, I can't afford to try them) geared towards big money-making studios (where licenses are generally in the tens of thousands per year) and 5 to 10 year old code for a random SIGGRAPH paper that seems so promising but isn't written for general use and/or is an absolute nightmare to compile. There are things in between but they're relatively rare. In contrast, for data science, for example, there is a massive wealth of libraries/software of different scales out there to use.
  • Related to the previous point, I've found that where native Rust libraries exist for some of these they're often unexpectedly lopsided. For example, the tobj crate can load .objs but it can't save them. I don't know enough about the format to say more—I'm sure there's a good reason, but it just seems strange to me.
  • The ecosystem is still very Windows-focused, given that Windows is still the dominant computer gaming platform. wine is a godsend here, at least for running .exes; so far I haven't had much luck compiling Windows C++ programs (using msbuild or msvc or clang or whatever).

High-poly burger (20,276 faces)

Low-poly burger (200 faces; ~1%)

Reducing polys

There are a lot of different 3d model processing tasks but fortunately for me the only one I'm concerned with is "mesh simplification", i.e. taking a high-poly mesh and turning it into a low-poly one that still resembles the original. Generally you will bake some of the high-poly mesh information as textures (e.g. a normal map) to help with this.

There's a related task of creating an "imposter", where we don't modify the mesh itself but instead create a simple proxy polygon, e.g. an octahedron. You then pre-render the object from various perspectives and those are then projected onto the polygon. The idea here is if an object is going to be static and only viewed from a few angles, we don't need to store/render all the geometry as we're essentially looking at a 2d image.

Imposters are probably the right approach for set-piece elements and the like. They're much easier for me conceptually and because of their simplicity are probably going to be more robust than actually mutating the mesh. There are plenty of Unity plugins that do this; I haven't tried them yet but they're all well-reviewed.

But for anything more complicated, especially things that need to move, imposters won't be enough. We have to actually change the geometry to reduce the poly count.

I've seen a few different terms for this task; I'm not sure what the distinctions are between them, if any: simplification, decimation, remeshing, retopology, reduction, LOD generation, and probably more.

Reflecting the pattern above there are a few "pro" options for this task, namely Simplygon which seems to be the industry standard (and if I'm not mistaken is integrated into the Unreal Engine's mesh simplification routines), evident in its whopping cost of $35,000 per year. They do have a free version but it's very limited. There's also InstaLOD which has a more generous free option, but I haven't been able to download it and I think it excludes the use of the C++ API. When there are free offerings direct API access is usually behind the paywall or, when no free offering exist, behind the more expensive plan. For example, with Pixyz it's $1,350/year for just the plugin and $2,450/year for the Python API.

So I haven't tried any of these products but I wonder how much better they are in terms of raw mesh simplification quality. They probably have a bunch of other features important to giant studios like build system integration or support for more esoteric workflows/needs; that might be more of the selling point than how good their mesh simplification algorithm is. I wonder this partly because after looking through the free or cheaper options they mostly use the same approach: some variation of quadric mesh simplification. As I understand this basically involves computing a metric (the quadric metric) for each edge in the mesh, essentially ranking the edges according to how important they are (I'm waving my hands) and then deleting the least important edge. Rinse and repeat until you hit your target face/vert count.

Some examples that I believe use this approach are SeamAwareDecimater, FastQuadricMeshSimplification, MeshLab, and nanomesh. On my test meshes they all give similar results. It feels like this approach is better suited to preserving as much detail as possible when simplifying, which is great for going from high-poly to mid-poly, but when you start to get to the very low poly ranges (<3000 faces or so) the mesh just starts to degrade, have holes, etc.

This thread discusses some of the other shortcomings of this approach and is where I first encountered the term "silhouette protection". With the quadric approach you eventually get to the point where you start deleting faces and start to lose essential elements of the model, until it becomes unrecognizable. Silhouette protection is meant to stop the algorithm before it reaches this point; or it may be a totally different simplification approach, I don't really know.

One approach I thought might work is to take the convex hull of the mesh and iteratively introduce edges, essentially "shrink-wrapping" the hull around the original mesh until you reach the desired number of faces or some minimum error between the mesh and the hull. The downside with this approach is that I don't think it'd work for meshes that have holes because a convex hull doesn't take those into account (afaik).

I wasn't able to find much pre-existing software that does this, just Semi Convex Hull for Mesh Simplification and Boundingmesh which uses "bounding convex decomposition". I wasn't able to get them to finish simplifying my heavier test meshes, they ran without terminating. However, I believe this approach is kind of how collider meshes are computed, but looking at this collider mesh generation plugin it seems like the approach (for at least the VHACD algorithm; see also and here) is to break down the mesh into different parts and then build the collider mesh from the convex hulls of those individual parts, thus the mesh is no longer contiguous. But this does get around the hole problem I mentioned, and I guess you could re-join the individual parts though.

So unfortunately no clear resolution yet, but there's still more to try.


Fugue Devlog 25: More generic player handling, inventory UI, and more.

06.02.2023

Hard to believe it's been less than three weeks since the last update. I've managed to finish a lot even though I feel like I haven't had much time to work on things (especially with Tears of the Kingdom out now).

Better character movement

I mainly was procrastinating because I needed to fix some issues with the AI/NavMeshAgent character movement and I had no idea where to start. NavMeshAgent is Unity's built-in character pathfinding system, and it's not bad. I'm using it with root motion (i.e. the animation drives movement rather than direct modification of the character's world position), which makes working with a bit more complicated.

The problem was that when the character was running they would never be able to turn fast enough to match their computed path. So they would overshoot things and run into walls while making large turns. There is an angularSpeed setting but it didn't seem to have any effect. I toyed with having root motion drive the rotation too, but it ended up being too complicated; and even so, the direct rotation looks fine.

What I ended up doing was manually controlling the character's rotation, rather than letting NavMeshAgent do it:

_agent.updateRotation = false;

// ...

// Called in Update
private void SyncAnimatorAndAgent() {
    // ...

    // Handle turning ourselves, rather than
    // delegating it to the NavMeshAgent;
    // this allows us to have more control.
    // Turn faster if running.
    var step = maxTurnSpeed * Time.deltaTime * (shouldRun ? 2 : 1);
    Vector3 direction = _agent.steeringTarget - transform.position;
    direction.y = 0; // Ignore up/down
    var targetRotation = Quaternion.LookRotation(direction, Vector3.up);
    transform.rotation = Quaternion.RotateTowards(transform.rotation, targetRotation, step);

    // ...
}

This lets me change the rotation speed based on how fast the character is moving (i.e. running or walking). It also lets me have conditional behaviors based on the magnitude of required rotation. For example, if the character needs to turn 180deg, then I can have them turn before starting to move, which also looks a bit more natural.

There's definitely a lot more tweaking to be done, but I'm happy with the results for now.

Changing the player character

One feature I wanted to have was for the player to swap out what character they're controlling. Like all JRPGs I want party composition to be an important element of gameplay. This fortunately wasn't too complicated, in part because of the character generation workflow I set up earlier (always nice when that work pays off!). Because all characters share essentially the same skeleton, I just need to swap to the new character's skeleton (and model) and update a couple other parameters (how tall they are, etc).

The one tricky bit was rebinding the new skeleton to a plugin I'm using that controls where the character is looking. There's no built-in way to do this rebinding. Fortunately after digging through the source code I managed to find a solution:

public void RefreshLooker() {
    // NOTE this assumes the path is always the same,
    // which it might be due to `clay`
    _looker.LeadBone = transform.Find("Model/Armature/Root/pelvis/spine_01/spine_02/spine_03/neck_01/head");
    _looker.RefreshLookBones();
    _looker.InitializeBaseVariables();
}

I did have to change RefreshLookBones from an internal to a public method though, so it's not ideal.

Inventory UI

The biggest feature is the inventory UI, which is an RE-style spatial inventory system. I like it better than other inventory constraints, like a weight limit, though it can still be tedious to manage (need to find some good C# bin packing libraries to implement an auto-sort).

This was my first time making a substantial UI in Unity, using their UIElements system. It felt very weird to use what are essentially HTML and CSS (UXML and USS, respectively), and it took me some time to figure out how exactly I should structure things. The system needs some React or Solid-like framework to round it out.

My current approach is to avoid the UXML as much as possible and build the UI in C# instead (essentially creating "components" by inheriting VisualElement). Hopefully the UI demands remain simple enough that this remains viable.

The C# approach made it easier to design the inventory UI as a modal interface, i.e. different inputs change the UI's mode, which makes it easier to ensure that there are less invalid states. The normal mode is just moving the inventory cursor around and entering other modes. For example, pressing the "move" button over an item in normal mode changes the mode to Moving, which then remaps inputs for that particular context (e.g. what was once the "use item" button is now the "place item" button). This feels like the cleanest, most extensible approach, but goodness does UI always take way more code than I anticipate.

I'm not going to include a screenshot of the inventory UI because it looks terrible, but it is passing all its tests!

Dice System

I played Citizen Sleeper and enjoyed it. The dice system there is great, and makes much more sense for the type of game I'm working on than the ones I mentioned in the last update. I'm definitely going to riff off of it for Fugue's skill check system.

Other bits

  • I also implemented a proper scene manager, which handles changing scenes and loading in the player character. Took longer than I expected, but seems to work well enough.
  • I changed the verses script deserialization from JSON to YAML. The JSON deserialization code was a mess, and possibly kind of slow? I found a fast YAML library that vastly simplifies the script importer. YAML's more pleasant to look at too.

Next steps

Two main things are on my mind:

I want to start implementing the dice/skill check system so I can finally test it. It's the game's core mechanic, so I need to make sure it makes sense before running too far ahead.

I want to use the Unity editor as little as possible. It's kind of janky and just slow for me to work in. I don't want to learn all of its shortcuts and wait for it to respond. The way I see it there are three primary activities I need the editor for:

  1. Compiling C# and running tests
  2. Building scenes
  3. Building/testing the game

There may be a way around 1) but I have a feeling it would be very painful to set up, and perhaps not much of an improvement in terms of speeding up the development loop. There's no way around 3), but it's a relatively infrequent activity at this stage so I'm not worried about it.

I expect 2) will be where most of my Unity editor time will be after I've implemented the game's core features. It's unpleasant, especially in contrast to 1) where I'm mostly writing in my comfortable text editor and hopping to the editor only to compile and run tests. I would love to have something equivalent to my text editor but for building Unity scenes.

Fortunately this might actually be possible. Unity's scenes are really just specialized YAML files, and I've already built part of a Rust parser for them in verses. In theory you could set up an external program to edit those YAML files. I'd need to be careful in scoping the tool, however. I don't want to end up re-implementing a huge part of Unity's editor.

For version 1 of umarell, which is what I'd call this tool, I'd probably just want to modify transform information (position, rotation, scale). I'd still have to import objects into the scene in Unity first (which is a relatively infrequent activity), to ensure that they're properly initialized with all the right properties and what not. Then I'd pop over into umarell and position things.

I imagine the scene building workflow would be something like:

  1. Build the static set elements in Blender.
  2. Create a new scene in Unity and drop in all the objects that should be in the scene, and perhaps also attach any scripts/components they need.
  3. Open the scene in umarell and start setting all the objects up.

I looked a bit into what the Rust ecosystem for something like is like, and this might be possible with rend3 and egui. It's not a high priority at the moment—I need to finish getting all the systems down—but could be a fun project later.


Fugue Devlog 24: Puttering Along

05.12.2023

I've been slowly chipping away at porting things to Unity, sketching out new game systems, and tweaking the verses script syntax.

verses Updates

For verses I'm constantly changing things to try and get the most concise syntax I can, without it becoming too hard to skim.

Two of the biggest changes are:

  • Multiline remarks, which make it easier to write consecutive lines that are said by the same actor.
  • Allowing conditionals to be inlined into a verse. Previously any conditional behavior had to be defined as a branching action, which would have to connect to a different verse entirely.

For the second change, the way it worked before was clunky. Say I want to have a character say something if foo==bar and then return back to the normal dialogue.

@root
Branch:
  - @next_verse
    If: foo==bar
  - @default_verse

@next_verse
[Character] Foo equals bar!?
Branch:
  - @default_verse

@default_verse
[Character] Continuing the convo...

This is a lot for what is essentially just a minor aside. The changed syntax introduces a new action, Aside, which groups actions under a condition, and then resumes the normal flow. So that script above would now be written:

@root
If: foo==bar
  [Character] Foo equals bar!?
[Character] Continuing the convo...

There are some other more minor improvements, like immediately specifying dialogue choice consequences/outcomes. Previously this would also be clunky, involving some variable being set by the script runner and then checking for this variable later on. Really roundabout and relies on things happening that aren't defined in the script itself. Now it's just a matter of:

[Character] Make a choice
  - A choice
    Outcomes:
      AddItem: SomeItem

The other change is better variable namespacing. Previously there was just "local" (local to the script) and "global" (set across the entire game). The scopes are now "script" (local to the script), "story" (local to the story the script is a part of, e.g. within the context of a mission), and "global". This will hopefully make managing script variables easier and cleaner.

The last major verses update is that I actually got Unity scene parsing working well in Rust, and ended up stripping out Godot scene parsing entirely (not worth maintaining both).

Semi-related, I also switched entirely from vim to nvim/neovim and set up custom highlighting and in-editor parsing/validation for the game scripts:

verses in nvim

Unity Updates

The Unity version of the game is more or less at parity with the Godot version now. I've also implemented a very rough first draft for several other game systems (time, missions, inventory, etc). For inventory I'm tentatively using an RE-style spatial inventory, since it feels like a better way to limit inventory than weight/encumbrance, and is visually more interesting to manage. Still need to build out the UI for it though.

Because I'm expecting development to take a long time I switched over away from the LTS version of Unity to the 2022 version. So far it's been a better editor experience—less laggy, though the compilation loop still sucks.

In general my experience with Unity has been very positive. I've been able to structure my code in a better and more reliable way than with Godot. The renowned Scriptable Object talk was extremely helpful in designing an architecture that feels easy to build on. Unity's component-based system is much nicer for decoupling, and having access to a more mature programming language is worth a lot (C# features like interfaces are very handy).

I'm still getting used to how Unity does things, like addressables and what not. There is a lot that's clearly meant for very advanced, high-end games, and it's hard for me to discern what's overkill for me to adopt now and what I'll regret not using further in the development process. But that's just how these things go.

In general my focus now is on lowish-level framework stuff (currently trying to get character movement to work correctly). There are still many undetermined mechanics that will require playing around with, so trying to design things to flexibly accommodate different possibilities, or at least get a good foundation to experiment on. At some point soon I'll cross over into actual gameplay and eventually writing (I hope).

For now the current near-term roadmap is:

  • Get character movement working well
  • Start building out more UI

Dice mechanics

I haven't thought much on mechanics as I've been in implementation-mode for the past several weeks, but I have some more thoughts on missions, the energy mechanic (a stand-in for some kind of resource management mechanic). I find myself coming back to the Mario Party character-dice system and the system from Dicey Dungeons where you assign dice to slots. I like these better than regular D&D-style dice rolls because there's some randomness but enough room to strategize so that you have more agency over outcomes.

Dicey Dungeons

Super Mario Party character dice blocks (via)

While searching for the images above I came across a game called Slice & Dice where you construct the dice yourself!

Slice & Dice


Fugue Devlog 23: Migrating to Unity & Clay

04.14.2023

Unity screenshot

Migrating to Unity

So the last post was about migrating to Godot 4 and now I've gone and started migrating to Unity. At the start of this project I was deciding between Unity and Godot and ended up going with Godot for a few reasons, a big one being that I had used Unity maybe 8 or so years ago (I was originally developing The Founder in Unity) and hated it. At the time I believe Unity's UI support was basically non-existent and the game was rather UI-heavy, so it was a frustrating experience. I think the Unity Editor for Linux was also in beta, though I was probably using OSX at that point.

But recently I figured Unity was worth another look, since this is a 3D game and less UI-heavy, and surely things have improved in the interim years. And they have. The Unity Editor for Linux works (more on this below) and the Unity ecosystem is of course more mature and battle-tested.

Some other considerations:

  • Console/closed-platform support. A big downside with open-source game engines like Godot and Bevy is that they can't yet build for consoles, in part because these platforms require their integrations be closed-source (or something along those lines).
  • Built-in animation retargeting. It's been a struggle to figure out how to retarget animations for my generated characters. I was using the Auto-Rig Pro addon for Blender, which works great but wasn't giving me the right root motion results in Godot. It seemed very complicated to debug. Unity, on the other hand, has a built-in animation retargeting for humanoid rigs that works great.
  • C# is a more mature and strongly-typed language. Godot 4 improved a lot with GDScript but ultimately it still feels too in-development. It has typing support but many important types are lacking and it just doesn't feel as solid as a proper strongly-typed language. C# isn't the prettiest language to work with, but it feels like a good, stable foundation for a game.

And a couple other bonuses:

  • I haven't done much UI work just yet but Unity's new UI Toolkit system is interesting...the styling and layout is basically CSS.
  • Package management is also nice with openupm.

So far I don't have much bad to say about my new Unity experience. The biggest issue is that the Editor still feels kind of janky in Linux; it's rather slow and a bit buggy. It might still technically be in beta. I can't, for example, drag and dock tabs into panels, which is annoying (see below for a workaround). Not sure if this is a limitation with my window manager or what. Godot's Linux support on the other hand is amazing; their editor feels responsive and stable.

Setting up my text editor was tricky but it's working alright now, except that I have to restart nvim to properly process new files (see this issue) and that the language server takes a long time to start.

In general the development loop feels slower than Godot, largely due to the increased compilation times. There are some ways to improve these times (mainly by essentially bundling your code into sub-packages with assembly definition files), but so far I haven't noticed a major improvement (though it's probably not apparent until your project gets quite big). It's not the worst thing but it does make development drag a bit.

And a very minor gripe is the number of artifacts that Unity produces. Tons of .csproj files and other folders. Godot was really lean in this regard; I believe all these generated artifacts were confined to a hidden .import folder.

(I'm also stubbornly not doing the C# new-line curly brace thing)

I'm still getting familiar with most of Unity's core concepts—how input handling works, how unit testing works, etc—and so far haven't encountered any major road blocks. The documentation is ok, but I've still had to do a bunch of forum digging to figure out exact approaches to some problems.

I suppose one bit of weirdness is that there are two different UI systems available; one seems more appropriate for more static/simpler UIs (this is the CSS-like UI Toolkit system) and the other (soon-to-be legacy? idk) is a canvas-based UI system (closer to how UI works in Godot). The latter seems more appropriate for more dynamic interface elements—I'm using them for dialogue boxes primarily because they can use TextMeshPro which gives fine-grained control over text meshes. I think TextMeshPro is supposed to be integrated into the UI Toolkit? Maybe it is already? I don't know.

I am a little sad to stop using Godot...it's great and I'm excited to see where it goes in the next several years. It's already amazing how full-featured it is—perhaps it could become a Blender equivalent for game development. If Unity and Godot were at closer feature parity (especially with the three benefits listed above) I'd prefer Godot. But for now Unity makes more sense.

clay

I ported the character generation system from hundun into its own Rust package, clay, so I can generate characters independently of hundun and via, for example, a script in bulk.

Not much interesting to say here, except maybe on how I bundled static assets into the Rust binary. The character generation part relies on several Blender Python scripts that I need to know the paths for (so I can call blender /path/to/the/python/script.py). The trouble is these files could be anywhere, and I don't want to hardcode or constantly pass in the paths to these scripts.

What I do is package them (and other static assets needed, like brush images) with the compiled application using the include_dir crate. Then they can be extracted to a known location when needed:

/// An interface to run scripts with Blender.
/// Most of the character generation actually happens
/// in Blender with Python scripts. These Python scripts
/// are included in a kind of hacky way (see below).
/// This method means that if the Python scripts are edited
/// the Rust program needs to be re-compiled to include the
/// latest script versions.

use include_dir::{include_dir, Dir};
use std::{
    io::Error,
    path::{Path, PathBuf},
    fs::{create_dir, remove_dir_all},
    process::{Command, Stdio, ExitStatus}
};

const BLENDER_PATH: &str = "/usr/local/bin/blender";

// Where to extract the included Blender scripts when calling
// the `blender` command.
const EXTRACT_SCRIPTS_PATH: &str = "/tmp/clay-blender";

// Bundle the Blender scripts with the Rust binary.
// When needed we'll extract the scripts somewhere we can point to.
// This is a kind of hacky way to avoid juggling filepaths if this
// library is used elsewhere.
static BLENDER_SCRIPTS_DIR: Dir<'_> = include_dir!("$CARGO_MANIFEST_DIR/assets/blender");

/// Path to a file included in `BLENDER_SCRIPTS_DIR`.
pub fn bundled_file(path: &str) -> PathBuf {
    format!("{}/{}", EXTRACT_SCRIPTS_PATH, path).into()
}

/// Note: this assumes that `script` is bundled as parst of `BLENDER_SCRIPTS_DIR`.
pub fn blender(blendfile_path: &PathBuf, script: &str, env_vars: Vec<(&str, &str)>)
    -> Result<ExitStatus, Error> {
    // Extract the Blender scripts
    if Path::new(EXTRACT_SCRIPTS_PATH).is_dir() {
        let _ = remove_dir_all(EXTRACT_SCRIPTS_PATH);
    }
    create_dir(EXTRACT_SCRIPTS_PATH).unwrap();
    BLENDER_SCRIPTS_DIR.extract(EXTRACT_SCRIPTS_PATH).unwrap();

    let mut cmd = Command::new(BLENDER_PATH);
    cmd.args([
             "-b", &blendfile_path.to_string_lossy(),
             "--python", &bundled_file(script).to_string_lossy()
    ]);

    for (key, val) in env_vars {
        cmd.env(key, val);
    }
    let mut proc = cmd.stdout(Stdio::inherit())
        .stderr(Stdio::inherit())
        .spawn()
        .expect("blender command failed to start");

    let res = proc.wait();

    // Clean up extracted files
    let _ = remove_dir_all(EXTRACT_SCRIPTS_PATH);

    res
}

A very hacky way of setting the editor layout in Linux

I did manage to figure out a very hacky way of docking tabs in the end. You can export the current editor layout to a .wlt file, which is essentially just a YAML file (as far as I can tell, it's the exact same format that Unity game scenes use). So say for example I want to dock the Test Runner to be in the same dock as the Inspector. I'd open the Test Runner—which opens in a new window by default—and then save the layout. Then I'd edit the .wlt file. The YAML file consists of individual subdocuments, separated like so:

--- !u!114 &1
(some yaml)
--- !u!114 &2
(some more yaml)
--- !u!114 &3
(etc)

The key here is these dividers preceded by ---. The number after & is the id (specifically, the fileID) of that component. Some of these represent entire windows (so in my case I'd have a main editor window and the smaller window spawned for the Test Runner), others represent docks (which I identify by their m_Panes property), and others represent the tabs themselves.

The gist is to look for the Test Runner tab (by searching for m_Text: Test Runner) and then getting the id of that component (say it's 15). Then I look for the Inspector tab (searching for m_Text: Inspector) and get that id (say it's 20). Then I look for a subdocument where {fileID: 20} is an item under m_Panes. That will be where the Inspector tab is currently docked. I just add another entry below it: {fileID: 15}.

I search for the document to other references of {fileID: 15} and then clear anything that references those parent ids, recursively, just to ensure that there aren't multiple elements referring to the same component (i.e. deleting the dock that used to contain the Test Runner, and deleting the window that used to contain that dock).

Then save and load the layout in the editor.


Setting up NVIM for Unity development

04.07.2023

Specifically for Linux. I'm using Ubuntu 22.04 and Unity 2021.3.22f1, with nvim-lspconfig.

This was a pretty heinous setup process, so I'm documenting this here to help others who want something similar. The actual setup process isn't too bad, but figuring out all the individual steps was difficult. I came across a few guides but some were out of date, or were geared towards Windows, or just didn't work for me.

I should also caveat that I'm writing this shortly after I got this setup working, so I may run into other issues with it once I start developing with it more. For example, there might be issues with new files. If I run into those problems and manage to solve them I'll update this post.

Requirements:

  • omnisharp-roslyn, I'm using v1.39.6.
  • mono; but crucially not the one from the default package repos. You need to use their official repo; then install: apt install mono-devel mono-complete.
    • The default Ubuntu package repo version doesn't include MSBuild so unless you use the official mono repo you'll get errors like "Could not locate MSBuild instance to register with OmniSharp." when running omnisharp-roslyn.

The process:

  1. Download a release of omnisharp-roslyn (as mentioned above, I'm using v1.39.6). Extract it somewhere—for me, this was /opt/omnisharp-roslyn. The run file in that directory is what will start the LSP server.
  2. Configure nvim. For me this all goes in ~/.vim/plugin/nvim-lsp.vim, but you can change that to match your own preference. I'm including the whole file but the key parts are what follows -- Omnisharp/C#/Unity. You must specify the path to the omnisharp-roslyn run script.
lua << EOF
local nvim_lsp = require('lspconfig')

-- Use an on_attach function to only map the following keys
-- after the language server attaches to the current buffer
local on_attach = function(client, bufnr)
  local function buf_set_keymap(...) vim.api.nvim_buf_set_keymap(bufnr, ...) end
  local function buf_set_option(...) vim.api.nvim_buf_set_option(bufnr, ...) end

  -- Omnicompletion
  buf_set_option('omnifunc', 'v:lua.vim.lsp.omnifunc')

  local opts = { noremap=true, silent=true }
  buf_set_keymap('n', 'gD', '<cmd>lua vim.lsp.buf.declaration()<CR>', opts)
  buf_set_keymap('n', 'gd', '<cmd>lua vim.lsp.buf.definition()<CR>', opts)
  buf_set_keymap('n', 'gi', '<cmd>lua vim.lsp.buf.implementation()<CR>', opts)
  buf_set_keymap('n', 'K', '<cmd>lua vim.lsp.buf.hover()<CR>', opts)
  buf_set_keymap('n', '<C-k>', '<cmd>lua vim.lsp.buf.signature_help()<CR>', opts)
  buf_set_keymap('n', '[d', '<cmd>lua vim.diagnostic.goto_prev()<CR>', opts)
  buf_set_keymap('n', ']d', '<cmd>lua vim.diagnostic.goto_next()<CR>', opts)
  buf_set_keymap('n', 'gR', '<cmd>lua vim.lsp.buf.references()<CR>', opts)
end

-- Omnisharp/C#/Unity
local pid = vim.fn.getpid()
local omnisharp_bin = "/opt/omnisharp-roslyn/run"
require'lspconfig'.omnisharp.setup{
    on_attach = on_attach,
    flags = {
      debounce_text_changes = 150,
    },
    cmd = { omnisharp_bin, "--languageserver" , "--hostPID", tostring(pid) };
}
EOF
  1. Then we need to generate the .sln and .csproj files for our Unity project. There are two ways to do this:

    • Almost every other guide to this setup says you need to install Visual Studio Code to do this. This then requires that you go into your Unity project, go to Edit > Preferences > External Tools, then set Visual Studio Code to be your External Script Editor. Finally, check all the boxes for Generate .csproj files for:, then press Regenerate project files. This will work, and it's what I tried first.
    • The alternative, which I found here, is to run /opt/Unity/2021.3.22f1/Editor/Unity -batchmode -nographics -logFile - -executeMethod UnityEditor.SyncVS.SyncSolution -projectPath . -quit in your project root folder (note that /opt/Unity/2021.3.22f1/Editor/Unity is just where I installed the Unity Editor, so change that to point to your location). This will also work, and appears to work without installing VSCode. The only annoying bit is that a project can only be opened by one instance of the editor at a time, so this won't work if you already have your project open. Perhaps there's a way to call it from within Unity?
  2. Finally, one issue I had was that for some reason Assembly-CSharp.csproj wasn't generated. This led to the Unity framework not being picked up by omnisharp, with errors like "The type or namespace name 'UnityEngine' could not be found". This solved itself by creating a new C# file, e.g. Assets/Foo.cs and then refreshing the project files in the Unity Editor (which I guess causes Unity to compile the scripts and then generate this missing file). No idea if this is necessary though.

Lastly, the LSP server is slow to start up on my machine. Something like 30 seconds. For Rust and TypeScript development I use this plugin, which gives me progress on those LSP servers' startups, but unfortunately it doesn't yet work for omnisharp.

NB: Just a couple debugging tips if this doesn't totally work for you: :LspInfo and :LspLog from within nvim can help you figure out what might be going wrong.

>>