Clipping 3D objects in NGUI
Updated 1/30/2015
This week I’ve been putting together some of the 3D assets for The Founder and began incorporating them into the game’s UI. But I hit a snag:
These objects aren’t clipped like NGUI-native elements. I searched around for awhile but only came across half-answers. The two main suggestions were to use a clipping shader or Unity’s Render Textures. The latter involves setting up hidden cameras which render to textures and then using those textures as NGUI UITextures. It’s kind of a lot of setup and I wasn’t sure how it would work with my use case, which involves a grid of 3D objects.
Render Textures are a Unity Pro-only feature anyways so that was out of the question. There is a Unity Free hack which achieves something similar but doesn’t have the same optimization that comes with the official implementation.
That left the clipping shader (Note 1/30/2015: This is no longer true, see the update below). I have zero experience with shaders. Fortunately mathiassoeholm was kind enough to post their clipping shader. For the sake of completeness, I’ve reproduced the code below as well (note: I removed an extra unnecessary subshader from mathiassoeholm’s original implementation).
As I understand it, this shader functions the same way NGUI’s built-in clipping shaders work. The UIPanel handles the drawing of its children NGUI widgets and passes in the appropriate clipping information to their shaders. Since the UIPanel does not manage the drawing of these 3D objects, the ClippingModel class grabs the necessary clipping information from the nearest UIPanel.
Update: 1/30/2015
I was told of a better approach than the clipping shader I was using before (the original solution is preserved below). The clipping shader itself has issues if you want to render other NGUI UIPanels over your 3D objects. My original solution made it so that 3D objects always rendered on top. I have many semi-transparent overlays and popovers which the objects should render beneath, so this was problematic.
Fortunately, there is a better solution to this clipping problem which does not involve shaders (this solution is completely independent from the clipping shader approach) and works well with multiple UI layers.
All UIPanels in NGUI have a “Render Queue” property which by default is set to “Automatic”. This property controls the order in which these panels are drawn. Panels with a higher Render Queue value are drawn later.
Unity’s default inspectors for rendering meshes do not provide you access to this value, but this script (from here) gives you that access:
using UnityEngine;

public class SetRenderQueue : MonoBehaviour
{
    public int renderQueue = 3000;

    Material mMat;

    void Start ()
    {
        Renderer ren = renderer;

        if (ren == null)
        {
            ParticleSystem sys = GetComponent<ParticleSystem>();
            if (sys != null) ren = sys.renderer;
        }

        if (ren != null)
        {
            mMat = new Material(ren.sharedMaterial);
            mMat.renderQueue = renderQueue;
            ren.material = mMat;
        }
    }

    void OnDestroy () { if (mMat != null) Destroy(mMat); }
}
I attached this script to my 3D objects, set their material to use the Self-Illumin/Diffuse shader (so I wouldn’t need to light them), and put them on the “PlayArea” layer (the layer that NGUI uses).
Then it was just a matter of tweaking the related UIPanel’s “Render Q” settings. Aside from “Automatic”, you have the options of “Explicit” and “Start At”. I used “Start At” for my panels. The panels which I wanted to be beneath the 3D objects had a “Render Q: Start At” value lower than the render queue value I set for the objects. The panels which I wanted to be above the 3D objects had a higher “Start At” value. You may have to play around with these values to get exactly what you need.
The old clipping shader solution
There were not any clear instructions on how to actually apply the code provided, so here is how I ended up getting it working.
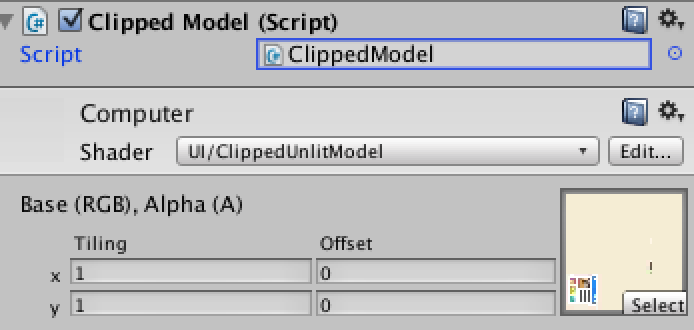
I attached the ClippedModel.cs to my 3D object and set my 3D object’s material’s shader to be the UI/ClippedUnlitModel shader.

Then I made sure that the closest UIPanel (in my case, the Scroll View which held the grid of objects) had it’s Clipping property set to “Soft Clip”.

I thought this would be enough, but then I started having weird transparency issues:
This effect is more like punching a hole through the UI to reveal the game world underneath.
I’m not sure if this is the best or the correct approach, but I managed to solve this by using a separate camera to render the 3D objects.
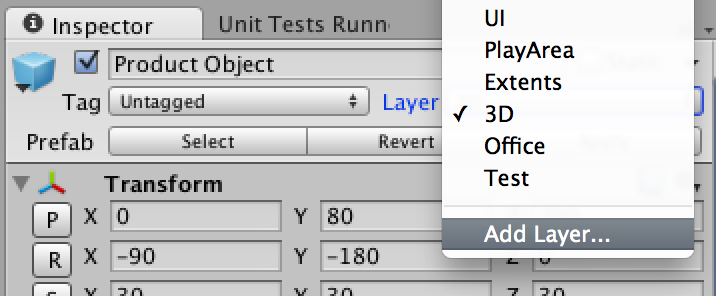
First I created a new layer and called it “3D”.

Then I set my 3D object to be on this layer.

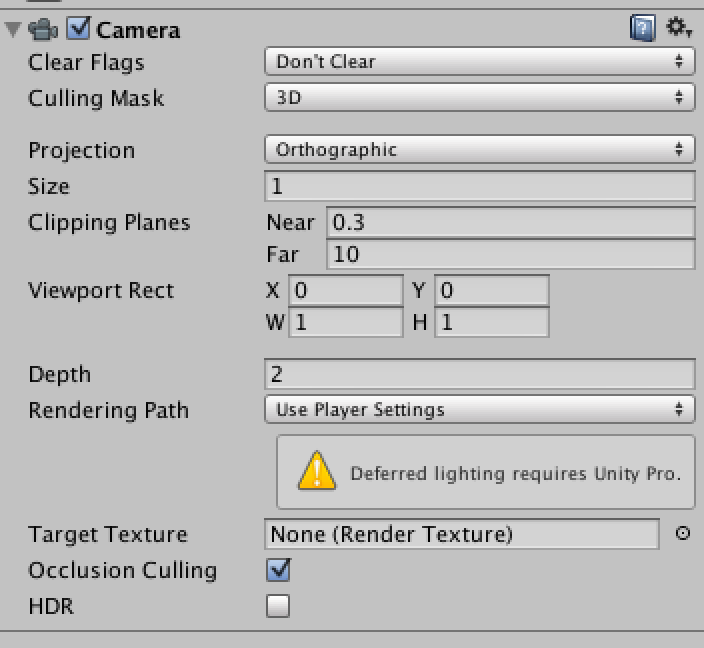
Then I created a new camera, positioned it appropriately (so that your object is in view), and configured like so:

You may need to play with your object’s Z position to get it to show up above the UI.
The most important setting here is that the Depth is 2 and the Culling Mask is only the 3D layer.
I also set the NGUI Camera to be at a Depth of 1 so that the 3D camera renders over it. I can’t remember if this was the default setting though.
Viola!
ClippedUnlitModel.shader
Shader "UI/ClippedUnlitModel"
{
    Properties
    {
        _MainTex ("Base (RGB), Alpha (A)", 2D) = "black" {}
    }

    SubShader
    {
        LOD 200

        Tags
        {
            "Queue" = "Transparent"
            "IgnoreProjector" = "True"
            "RenderType" = "Transparent"
        }

        Pass
        {
            Cull Off
            Lighting Off
            Offset -1, -1
            Fog { Mode Off }
            ColorMask RGB
            Blend SrcAlpha OneMinusSrcAlpha

            CGPROGRAM
            #pragma vertex vert
            #pragma fragment frag

            #include "UnityCG.cginc"

            sampler2D _MainTex;
            float4 _PanelOffsetAndSharpness;
            float _PanelSizeX, _PanelSizeY;

            struct appdata_t
            {
                float4 vertex : POSITION;
                half4 color : COLOR;
                float2 texcoord : TEXCOORD0;
            };

            struct v2f
            {
                float4 vertex : POSITION;
                half4 color : COLOR;
                float2 texcoord : TEXCOORD0;
                float2 posInPanel : TEXCOORD1;
            };

            v2f vert (appdata_t v)
            {
                v2f o;
                o.vertex = mul(UNITY_MATRIX_MVP, v.vertex);
                o.color = v.color;
                o.texcoord = v.texcoord;

                float2 clipSpace =  o.vertex.xy / o.vertex.w;

                // Normalize clip space
                o.posInPanel = (clipSpace.xy + 1) * 0.5;

                // Adjust for panel offset
                o.posInPanel.x  -= _PanelOffsetAndSharpness.x;
                o.posInPanel.y  -= _PanelOffsetAndSharpness.y;

                // Adjust for panel size
                o.posInPanel.x  *= (1 / _PanelSizeX);
                o.posInPanel.y  *= (1 / _PanelSizeY);

                // Transform back to clip space
                o.posInPanel *= 2;
                o.posInPanel -= 1;

                return o;
            }

            half4 frag (v2f IN) : COLOR
            {
                // Softness factor
                float2 factor = (float2(1.0, 1.0) - abs(IN.posInPanel)) * _PanelOffsetAndSharpness.zw;

                // Sample the texture
                half4 col = tex2D(_MainTex, IN.texcoord) * IN.color;
                col.a *= clamp( min(factor.x, factor.y), 0.0, 1.0);

                return col;
            }
            ENDCG
        }
    }
}
ClippedModel.cs
using UnityEngine;

[ExecuteInEditMode]
public class ClippedModel : MonoBehaviour
{
    private UIPanel _panel;
    private Material _material;

    private int _panelSizeXProperty;
    private int _panelSizeYProperty;
    private int _panelOffsetAndSharpnessProperty;

    private float _virtualScreenWidth;
    private float _virtualScreenHeight;

    void Start()
    {
        _panel = UIPanel.Find(transform);
        _material = !Application.isPlaying ? renderer.sharedMaterial : renderer.material;

        _virtualScreenWidth = UIRoot.GetPixelSizeAdjustment(gameObject) * Screen.width;
        _virtualScreenHeight = UIRoot.GetPixelSizeAdjustment(gameObject) * Screen.height;

        _panelSizeXProperty = Shader.PropertyToID("_PanelSizeX");
        _panelSizeYProperty = Shader.PropertyToID("_PanelSizeY");
        _panelOffsetAndSharpnessProperty = Shader.PropertyToID("_PanelOffsetAndSharpness");

        Update();
    }

    void Update()
    {
        if (_panel.hasClipping)
        {
            var soft = _panel.clipSoftness;
            var sharpness = new Vector2(1000.0f, 1000.0f);
            if (soft.x > 0f)
            {
                sharpness.x = _panel.baseClipRegion.z / soft.x;
            }
            if (soft.y > 0f)
            {
                sharpness.y = _panel.baseClipRegion.w / soft.y;
            }

            Vector4 panelOffsetAndSharpness;

            // Get offset
            panelOffsetAndSharpness.x = ((_virtualScreenWidth * 0.5f + _panel.baseClipRegion.x) - (_panel.baseClipRegion.z * 0.5f)) / _virtualScreenWidth;
            panelOffsetAndSharpness.y = ((_virtualScreenHeight * 0.5f + _panel.baseClipRegion.y) - (_panel.baseClipRegion.w * 0.5f)) / _virtualScreenHeight;

            // Get sharpness
            panelOffsetAndSharpness.z = sharpness.x;
            panelOffsetAndSharpness.w = sharpness.y;

            // Set shader properties
            _material.SetFloat(_panelSizeXProperty, _panel.baseClipRegion.z / _virtualScreenWidth);
            _material.SetFloat(_panelSizeYProperty, _panel.baseClipRegion.w / _virtualScreenHeight);
            _material.SetVector(_panelOffsetAndSharpnessProperty, panelOffsetAndSharpness);
        }
    }
}

